Assignment 5 Report
Introduction
High-voltage powerline work is very dangerous, especially so for inexperienced trainees. This application provides a safe and affordable way for high-voltage powerline workers to learn and practice real-world situations such as installing a spacer on a set of power lines.
Since our last devlog we have combined components into one simulation and added a system to tell the trainee when they have performed a task wrong. After performing user testing we implemented several key improvements to the simulation. Error messages are now less confusing, more buttons have been added for accessibility and objects are now labelled.
Technical Development
There are four main components to this simulation, the:
- Helicopter
- Wand
- Clip
- Spacer
- Controller
Helicopter
The helicopter used was from an asset created by SunCube [1]. Its movement was original designed to be controlled by a player which meant that it can easily adjustable rotor speeds. To control these speeds and the movement of the helicopter a script named HarryHeliController was created. This script used iTween [2] to implement the movement of the helicopter. The script has four public transform variables which dictate the path the helicopter will take. The script also has three public functions. A function to tell the helicopter to take off, another to tell it to move closer to the power lines and a final one to tell the helicopter to stop all motion and prevent any further movement.
Further design development would be to add a small shake to the helicopter to better simulate real world movement.
Wand
The wand is a simple stick like object that can be picked up and zap a power line when close to it. It will also stop zapping once it has contacted the power line. Interaction with the wand was heavily based off the interaction design found in the BasicGrab sample scene provided by the Oculus SDK [3]. The main changes made was altering the position and size of the grab area. The zap was implemented using an asset created by Jeff Johnson [4]. It was a simple asset that creates a particle effect between two points. One of these points was placed on the end of the wand, and the other on the power lines. The position of the point on the power line was controller by a script (ZapScript) to ensure it was always in line with the starting point (only one free axis). This created the effect that the wand was always conducting to the closest point on the power line. A zapping audio effect [5] was also added to the zap game object. A large box collider set as a trigger was added to the wand. This was used to detect if the wand was close to the power line, turning the zap on or off. There was also a collision detection between the wand and the power line which also turns the zapping on or off. There are two public Booleans associated with the wand. One indicates if the wand is currently zapping, and the other if it is touching the wire.
Further design improvements would be to create better logic to determine where the wand zaps too. More specifically, the wand can only zap to one of the four power lines when it should be able to zap to the closest out of all four of them.
Clip
The clip is an interactable object which can open and close, allowing it to attach to the wire. Interaction was set up the same way as the wand. The trigger button on the remote was set up to change the model of the clip to an open state, simulation opening and closing the clip. The Oculus PhysicsGrabbable script was also modified to prevent the trigger button opening the hook when it was not held. It was later found out that Oculus provided a script (PointableUnityEventWrapper) which created public events that could be used when an object is picked up or dropped. A collision was used to detect when the hook was in contact with the power lines, this information was made public by a Boolean value. A trigger could not be used in this case because the clip had to collide with the power lines.
Spacer
The spacer is an interactable object that when positioned with all four corners are in contact with the power lines it snaps into place, closing around the power lines. Interaction was set up in a similar way to the clip and wand, attempting to enable interaction on all four sides. This interaction however is very jumpy, snapping incorrectly. The main problem is that there is no specific right way up for the spacer unlike the clip and wand. This resulted in the spacer often flipping when picking it up. This could be improved by implementing a more basic grab type on the spacer. This was not implemented in this prototype since it operated adequately.
Snapping and position of the spacer was all controlled by a script name MasterClip, this script watched four other scripts (Clip Script) attached to trigger colliders on the four corners of the spacer. When the MasterClip script saw that all colliders where in contact with the power lines it switched the spacer model to a closed configuration and positioned at the closest point on the power lines, similar to how the wand zaps to the closest point on the wire. The spacer has a public Boolean to indicate if the spacer is attached or not.
Controller
The controller watches all public variables indicated above and decides if the trainee has performed a task wrong. This was implemented in script named MegaMind. There are three ways that the trainee could do something wrong. The wand is not the closet point to the wires when approaching of leaving the power lines. To implement this the MegaMind calcuates how close the helicopter is to the power lines, it compares this to if the wand is zapping or if the hook is attached. The second error occurs if the clip is attached or removed from the power line and the wand is not in contact with the power lines. The third error is if the spacer is attached and the clip is not. A fourth error could have been implemented for when the trainee leaves the clip on the power line. However, an error was not created for this because the simulation was designed such that the spacer had to be attached, and clip removed for the helicopter to fly away. This also means that the MegaMind has access to the public helicopter event to enable the helicopter to fly away from the power lines.
Other technical development of note:
Text
All text was implemented using text mesh pro, and the rich text aspect was used to format this text to make the information clearer.
Reset Scene
To prevent the repetition of the helicopter ride to the power line a second scene (KIT208_Asgmt_4_Scene_Reset) was made which is nearly identical to the main scene (KIT208_Asgmt_4_Scene_Main). The difference being the helicopter is placed next to the power lines, and the HarryHeliController is set up to account for this different starting position.
Buttons
Four pokable buttons were implemented from the Oculus sample scene BasicPoke. The colour was changed for each button and four methods were added to each button. Two of the methods where from the HarryHeliController script used to control the movement of the helicopter. The other two were public functions from the MegaMind to either restart the main scene or load the reset scene.
Overlayed error message
It needed to be made clear when the trainee had done something wrong. To do this a short error message was designed to pop up on screen. This proved challenging because Oculus did not support the screen space overlay canvas setting. Instead, a second camera was set as the child of the centre eye anchor. This camera has clear flags set to depth only and the culling mask set the UI layer. It also has its depth set to one. This meant that any canvas on the UI layer could appear in front of all world objects, even if it was set to camera overlay. To further make it clear that the user had made an error, all movement was stopped, and a failure sound effect was played [6].
Error message controller
A script named ErrorController was created to display all error messages. It had three main public variables that can be used to type in each error message. The controller would then take this message and convert them into their respective short and long error messages. When its displayError event was invoked, it would display the indicated short message to the overlay canvas and the long message to the error canvas which is easier to read.
Movement of the oculus interaction rig
Figuring out how to correctly move the interaction rig with the controller was a time consuming and confusing task. It was quickly discovered that neither the interaction rig nor the inputOVR components could be moved from the zero position, leaving only the camera rig itself that could be moved. Furthermore, the camera rig had to stay as the child of the interaction rig. This made it difficult to child the camera rig to the moving helicopter. The solution was to child the helicopter to the interaction rig, then the OVRCameraRig to the helicopter. There was still one problem. When holding interactable items and the helicopter was moving the items moved twice as far as the helicopter. This was because when the items were picked up by a hand and the helicopter moves, both the hand and the items are children of the helicopter and therefore move twice the distance they should. To fix this, when an object was pick up it was set to have no parent, but when dropped it was set back to the child of the helicopter.
Enabling physics when holding an object
By default, when an object is picked up it is set to kinematic. This meant that it could clip through objects which was not ideal for our application. To fix this, the PhysicsGrabbable script was altered to not set the object to kinematic and turn off gravity when picked up (again, using the PointableUnityEventWrapper script would have been a better method). However, since the object was no longer kinematic, if it interacted with another object and gain a velocity it would maintain the velocity, rotating around or moving away, taking the trainees hand with it. There was no nice fix for this problem, instead a script was added to each object name disableVelocity. On each fixed update this script set the angular velocity and velocity of the object to zero.
Rope
The wand and clip should have a rope (conductive cord) connecting them to the helicopter. We spent time developing a few different ropes. Unfortunately, they were all based on physics which meant when attached to the wand or clip, interacting with them was very difficult and disjoint. We needed a non-physics-based rope. One nonideal solution for this was to use line rendering. While this was considered it was not implemented because we decided that it was not needed for the trainee to perform the tasks correctly but should still be a future implementation to better educate the trainee and prepare them for the real thing.
Please note that this simulation works best when run in the unity editor.
3D Content
Base Helicopter Controller [1]
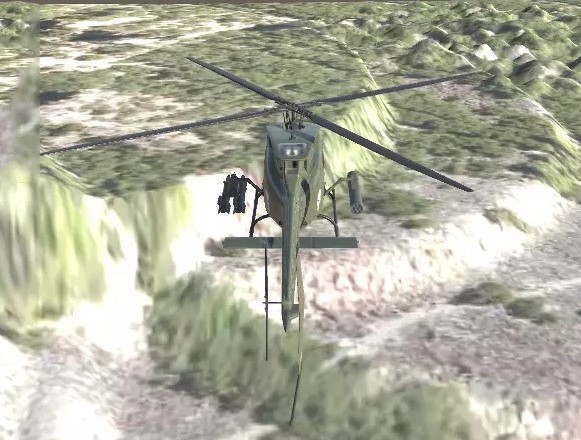
This asset was initially designed as a helicopter that could be controlled by a keyboard. We only made use of the helicopter model and the rotor speed controller script. This helicopter was used to transport the high voltage power line worker to the power lines, ideally the helicopter should be a lot smaller to better match the real scenario.
Electrical Pillar [7]
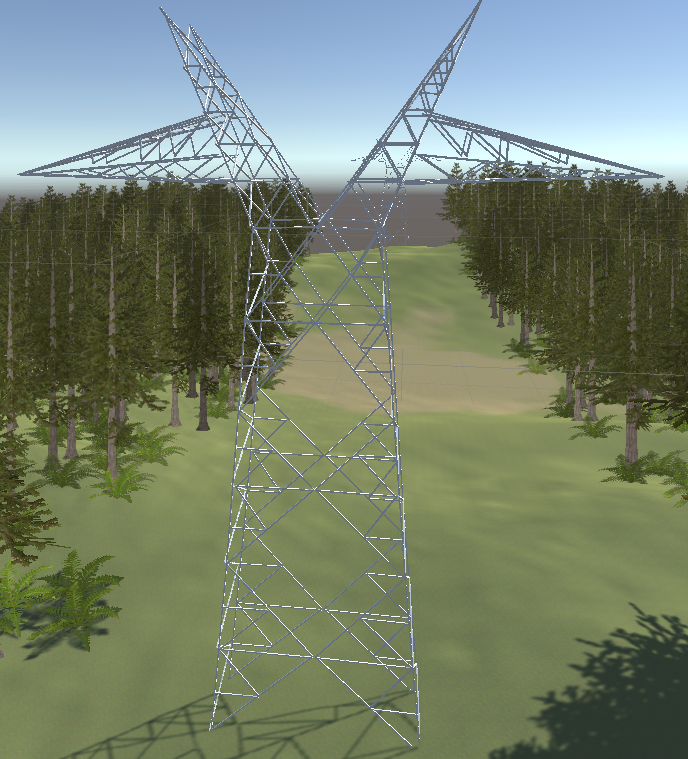
This asset is a 3D model of an electrical pillar with connecting power lines. We decided to delete power lines and add our own sets of 2 by 2 power lines that better matched our simulation.
Foliage Pack [8]


This foliage pack provided the trees and bushes to enhance the environment.
Conducting Wand
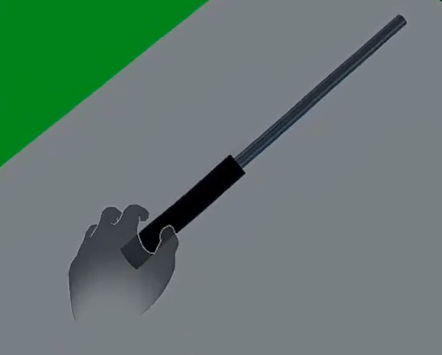
Self-made model created in the unity based on the default 3D objects. This object can be picked up by the trainee and zap the closest point on the power line. This conducting wand is a key tool used when operating on high voltage power lines.
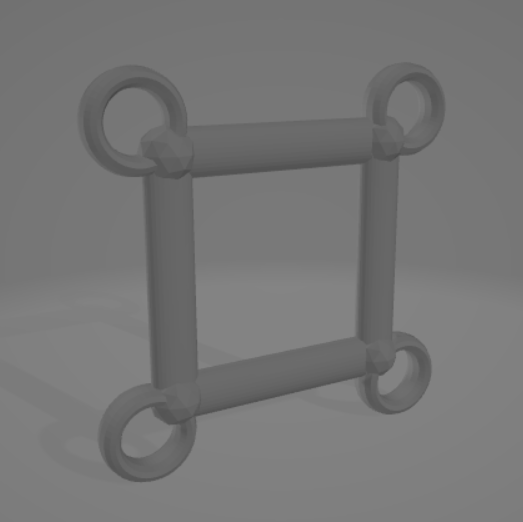
Carabiner Open & Locked

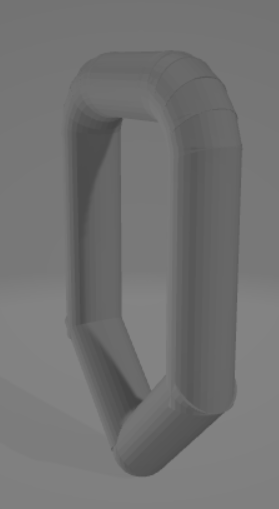

Self-made models used in the simulation to enable the trainee to attach a hook to the power lines. This is a key interaction for the trainee to perform, bringing the helicopter to the same voltage as the power lines. Attaching the hook allows the trainee use both their hands to attach the spacer.
Spacer Open & Locked
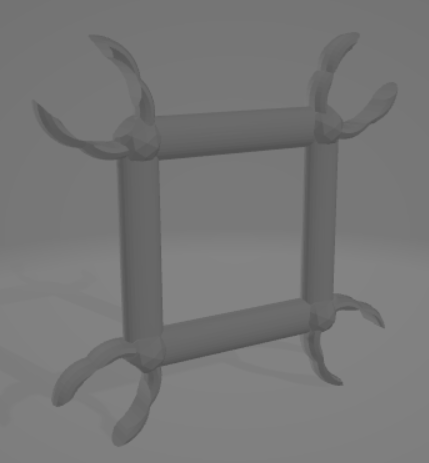
Self-made models utilised in the application as an arbitrary task for the trainee to perform on the high voltage power line. The trainee is required to attach this spacer model to the power line.
Buttons

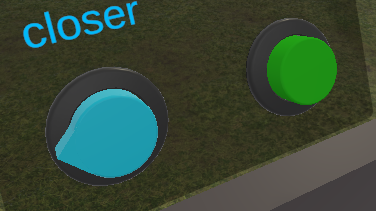
These button models are from the Oculus BasicPoke sample scene and are used as a way for the user to navigate and reset the scene.
Main scene
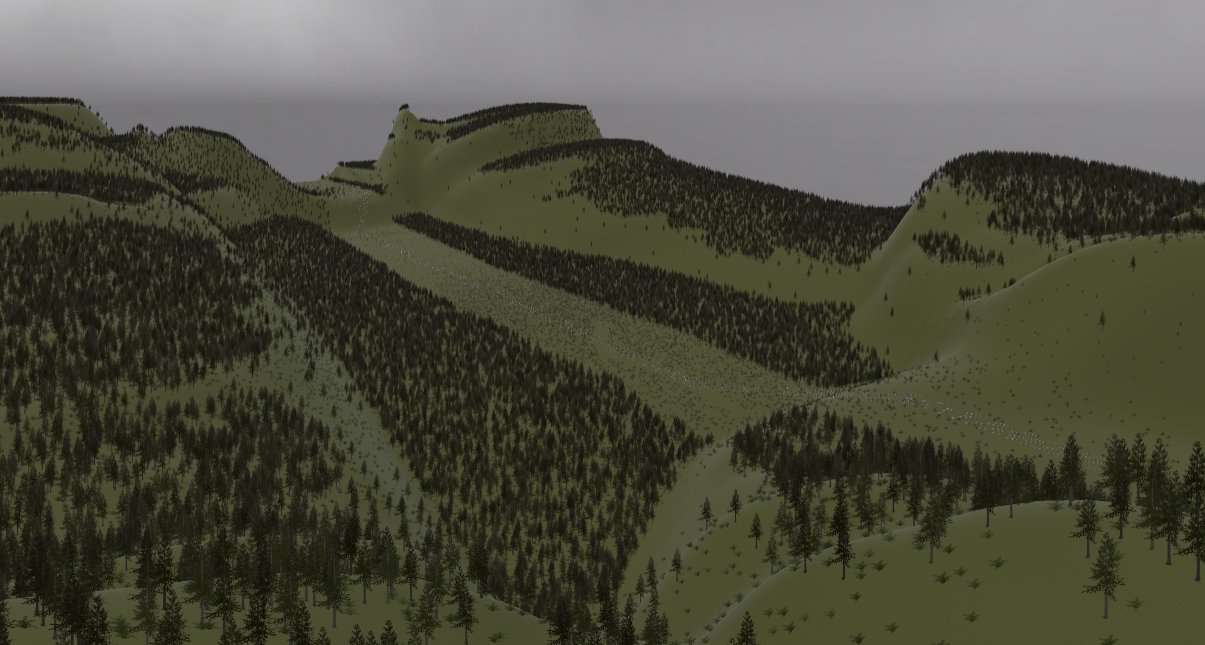
The terrain for this scene was designed using Unity’s terrain editor. Its main goal is to make the user feel less like they are in a simulation. This was achieved by having hills around all four edges and adding a skybox [9]. Improvements can still be made on the realism of the vegetation and the ground texture (clearly too glossy).
Usability Testing
The application is developed with the intention of providing a safer alternative to powerline work training. To accomplish this, usability testing is done to evaluate several aspects of the simulation, such as immersion, clarity, and potential bugs or extra feedback. The test is done by the participants simply by finishing the simulation, which in this case is to install a spacer on a powerline.
Questions are presented in the form of a Likert scale, allowing quantification of opinions, which we picked with simplicity in mind. A google form was used to collect and present data.
Firstly, we wanted to evaluate how immersive the simulation is. Several questions were made to answer this. For example, the height aspect of the helicopter ride, and how realistic the environment and each of the tools were. As research shows that simulating high-risk workplaces in virtual reality can activate trainees’ fears, and exposure to the source of anxiety allows them to, overtime, develop the courage to push past fear and perform the job.
After, Clarity of the instructions were evaluated. Participants were asked if they can follow the instructions and if they are able to remember the instructions after a single successful run. As the order of the instructions is important in real life powerline work.
Lastly, the participants were asked if there are any part of the simulation which can be improved. This question provides another perspective to development, perhaps exposing bugs that may seem to be normal to the developers. It also reduces experimenter’s bias, whereas if we were to test it ourselves, we are biased that the product is perfect, disregarding potential flaws [10].
The individuals chosen in the testing phase were picked based on convenience with each of the group members selecting friends or family members to carry out the testing procedure. This is regarded as a non-probability method of sampling as the sample population is not selected systematically and therefore does not guarantee equal chance for each member. When trying to represent the target population it is beneficial to use one of the probability-based sampling methods as it ensures equal chances for each subject [11]. This was however not a feasible option for this application as the target population is high-voltage powerline workers in training which is a very niche group and therefore hard to find suitable testers.
The protocol for testing was slightly varied between each of the group members, this was due to some unaddressed elements which may have contributed to different results. However the differences in protocol were minor and unlikely to effect the major issues found during the testing. The basic protocol established was to first brief the user, informing them that they are a high voltage powerline worker in training and therefore need to approach the situation as best as possible from that perspective. The next step was to get the user to place the virtual reality headset on their head, holding the motion tracked controllers in each hand. The simulation was then started, and the participant was encouraged to read the on-screen instructions performing them as written. After the participant had completed all of the tasks and exited the simulation, they were then prompted to fill in a google form which contained questions relating to different aspects of the simulation as well as a section to report any general improvements or bugs. The testing of the application was ideally done with minimal prompting but as we discovered this was rarely the case. The difference between each of the group members in there testing approach came down to if the participant was directed to sit or stand in an open room, this could have affected some of the aspects of the application and in the future, it would be beneficial to clarify details such as this before testing begins.
<span class="NormalTextRun SCXW134095608 BCX2" <the="" <="" span=""></span>
The participants were asked a series of questions to rate the level of immersion of each aspect of the application, the table below shows a summary of the users’ responses.
|
Aspect |
Immersion Level |
|
Helicopter height |
4.3 |
|
Environment |
4 |
|
Tools |
4 |
|
Danger |
3 |
Table 1. User responses to immersion level of each aspect of the application. Helicopter height relates to if the user felt the helicopter ride was high above the ground. Environment relates to if the user felt the environment was immersive enough. Tools relates to if the user felt that the tools used were realistic. Danger relates to if the user felt they were doing something dangerous while inside the simulation.
The graph below shows uses responses to questions regarding instruction clarity.
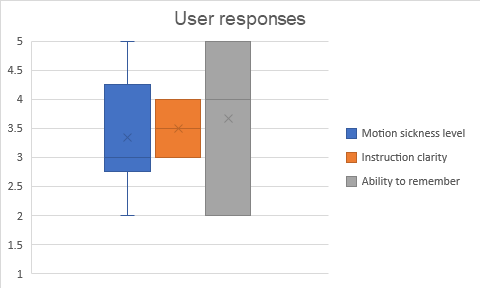
Figure 1. Graph showing user responses to useability level of different aspects of the application. Motion sickness level corresponds how much motion sickness the user felt while inside the application. Instruction clarity relates to how clear and concise the instructions were. Ability to remember relates to if the user felt they could remember how to complete the required tasks after one complete run through.
Finally, the users were asked if there were any general improvements or bugs. The most common improvement reported was the tools falling from the platform then not being able to be retrieved until the simulation was restarted (3 out of 5 participants reported this). The second most reported improvement was the instructions were at times unclear and it was difficult to determine the cause of fault (2 of 5 participants reported this).
It was found that the average level reported for the immersion was 4.3 for helicopter height, 4 for environment and tools, and 3 for danger aspect (Table 1). This corresponds to a positive result on the Likert scale for all accept the danger aspect which received a neutral value.
Figure 1 shows the average motion sickness level of 3.3 with most a large variability between users, this could be due to some of the participants conducting the simulation standing instead of seated causing an increased feeling of vertigo or motion sickness. The average instruction clarity was 3.5 with an even number of users finding the instructions clear and others rating it neutral. The ability to remember how to complete the simulation after a successful run had an average level of 3.7 with a large variability from 2 (disagree) to 5 (strongly agree).
Addressing the Results of the Usability Testing
We tried to improve the clarity of the user interface and implement additional interactions in order to address several inconveniences the participants found during testing.
A video inside the simulation may improve clarity, but we assume that the end-user of the simulation has some knowledge in the field, and if need be, the video would be shown before attempting the simulation. Putting a video, while it sounds simple, proves to be hard to implement inside the application as the objects doesn’t interact with each other very well.
Additional error messages were implemented to improve clarity upon the user mistakes, whereas before, there was only one message. A simple error is displayed in front of the user, with a detailed description being shown on a UI to the left of the user. Allowing the user to understand their mistakes.
More buttons were added to the simulation, now with labels indicating their functions. We’ve added a button to start the helicopter ride and another to move the helicopter closer to the powerline. They were added to allow the user enough time to read through the instructions. The other set of buttons allows the user to quit or reset the simulation. The reset button allows the user to skip the helicopter ride.
Labels are added on top of each of the tools, to improve clarity, and a wall is made surrounding the platform, to prevent the tools from falling off the platform during the helicopter ride.
References
[1] SunCube, “Base Helicopter Controller,” Unity Asset Store, 2015. https://assetstore.unity.com/packages/tools/physics/base-helicopter-controller-4... (accessed Sep. 25, 2022).
[2] Pixelplacement, “iTween,” Unity Asset Store, 2019. https://assetstore.unity.com/packages/tools/animation/itween-84 (accessed Oct. 01, 2022).
[3] Oculus, “Oculus Integration,” Unity Asset Store, 2022. https://assetstore.unity.com/packages/tools/integration/oculus-integration-82022... (accessed Sep. 02, 2022).
[4] J. Johnson, “Lightning Bolt Effect for Unity,” Unity Asset Store, 2022. https://assetstore.unity.com/packages/tools/particles-effects/lightning-bolt-effect-for-unity-59471.
[5] FlashTrauma, “Electricity,” pixabay. https://pixabay.com/sound-effects/electricity-6353/ (accessed Oct. 18, 2022).
[6] Na, “GTA V Wasted/Busted Sound Effect,” Sound Library, 2022. https://djlunatique.com/gta-v-wasted-busted-sound-effect/ (accessed Oct. 26, 2022).
[7] Pierrecesar, “Electrical Pillar,” Turbosquid, 2010. https://www.turbosquid.com/3d-models/electrical-pillar-max-free/576966 (accessed Sep. 25, 2022).
[8] J. Sullivan, “Foliage Pack Free,” Unity Asset Store, 2017. https://assetstore.unity.com/packages/3d/vegetation/foliage-pack-free-66155 (accessed Sep. 28, 2022).
[9] W. Soft, “10 Skyboxes Pack : Day - Night,” Unity Asset Store, 2016. https://assetstore.unity.com/packages/2d/textures-materials/sky/10-skyboxes-pack... (accessed Oct. 13, 2022).
[10] G. Tripepi, K. J. Jager, F. W. Dekker, and C. Zoccali, “Selection Bias and Information Bias in Clinical Research,” Nephron Clin. Pract., vol. 115, no. 2, pp. c94–c99, 2010, doi: 10.1159/000312871.
[11] M. Elfil and A. Negida, “Sampling methods in Clinical Research; an Educational Review.,” Emerg. (Tehran, Iran), vol. 5, no. 1, p. e52, 2017.
Leave a comment
Log in with itch.io to leave a comment.